Tuesday, December 13, 2016

Latest Track Plan

The track plan for the Rio Grande Southern Railroad continues to evolve.  One of my main goals is to provide many opportunities for operation.  This is a facet of the hobby that I have enjoyed more every time I have the chance to operate on a model railroad.

In this current iteration of the track plan, note that the return loop at Ridgway has been eliminated.  Therefore, this railroad will have a point-to-loop design, and will be operated as a point-to-point railroad.  Two branches are not shown on the current plan:  1.  the Telluride Branch, leaving Vance Junction and curving around past Ridgway; and 2.  the Enterprise Branch, which will leave Rico and curve around on a second deck above Dolores.  The prototype Enterprise Branch was a switchback line, with several mines and a mill, which will provide many operating possibilities.  It is also a branch I have not seen modeled often.


Rio Grande Southern Railroad, v2.5.  Track from Dolores  to Ridgway is subject to change.  Note that the Enterprise and Telluride Branches are not shown.


Sunday, December 11, 2016

Placerville Depot

I have begun construction of the Placerville Depot.  This kit is produced by Narrow Gauge Colorado, and consists of laser cut parts, stripwood, clear plastic window material, and laser cut roofing.  I painted the model with Star-brand paints, available from PBL, specifically D&RGW Trim Brown and D&RGW Jersey Cream.  Aleene's Tacky Glue was used for most construction.  The photos below show my progress on construction.

Step 1.  I began construction by building the platform.  This consists of laser cut parts that interlock together. Once the planking was stained with Hunterline Creosote, it was glued to the framework.
Step 2.  The laser cut matboard framework was assembled.
Another view of the assembled framework.

Step 3.  The walls were completed prior to assembly.  I started by painting the walls and windows with Star-brand D&RGW Trim Brown.  Once the Brown was dry, it was masked using 3M Blue Painters Tape.  Star-brand D&RGW Jersey Cream was then applied to the upper wall surfaces.  The assembled windows were then installed in the walls while flat.

Step 4.  I began assembly with this wall.

Step 5.  The second wall was added.
Step 6.  The front wall of the bump-out was added.


Step 7.  The left wall was added.

An additional view of step 7.

Step 8.  The right hand wall was added.

An additional view of Step 8.

Step 9.  The two end walls were added.


Step 10.  The rear wall was added.

Step 11.  The building was attached to the previously completed platform assembly.

Step 12.  The main roof panels were added to the depot.

Another view of Step 12.

 Roofing will be discussed in the next post.


Tuesday, November 22, 2016

Touch Toggles Installed

I recently installed the Touch Toggles described in my previous post.  I installed two small control panels to house the Touch Toggles, one at each end of Dolores.  Also, the Mini-Cup Toggle was installed in the new fascia at the Lost Canon stockpen siding.  I found the installation and operation of these controls to be so satisfying, I purchased an additional set to convert a series of turnouts in Durango from accessory decoders to Touch Toggles.

The following parts are required to control a Tortoise switch machine:
      1.  Power supply
      2.  Direct Base
      3.  Touch Toggles
      4.  Extension cables (optional)

When plugging the cable from the Touch Toggles (or the optional extension cables) into the direct base, pay attention to the orientation of the cable on the pins.  Match the location of the brown wire to the pin based upon the small flag-like icon printed on the Direct Base.  If plugged in backwards, the Touch Toggles do not throw the turnout, but they will not be damaged.

A single power supply can control multiple direct bases, either by plugging the Direct Bases into each other, or by using extension cables.

Upon powering up the Direct Bases, all turnouts are thrown to the straight-through position.  This may be helpful in ensuring the turnouts are thrown for the main line at the beginning of an operating session.

A one-inch hole is required to mount the Mini-CupToggle into the fascia.  I used a one-inch Forstner bit, and the Mini-CupToggle was a perfect fit.

A 1 1/2" hole saw is used to cut the hole in the fascia for the three-toggle cup.  E-6000 adhesive is used to secure the individual Touch Toggles to the back of the cup.  Also, a clear diffuser is included to provide even light.


One of the two controls panels for Dolores, CO.  The panel consists of an inexpensive 4" x 6" picture frame mounted at an angle on the layout fascia.  The cable from the Touch Toggles run through a small hole in the fascia to the Direct Base.

A closer view of the panel for Dolores, CO.  Note that all indicators are green.  This is the status following powering up the Direct Base.
The Mini-Cup Toggle mounted in the fascia.  These are ideal for lone turnouts.

The Three-Toggle cup mounted in the fascia.

New 4000-Series boxcars

 I recently had the opportunity to build three of the Narrow Gauge Colorado 4000-series boxcars.  These are highly detailed, laser-cut kits consisting of all parts necessary to build the cars, except for trucks and couplers.  I used Blackstone 3'7" archbar trucks and Kadee 714 HOn3 couplers.  The Kitchen Car is painted with Scalecoat II M&W (sic) gray, while the other two are painted with Star Models (available from PBL) D&RGW Freight Car Red.  The Kitchen car was supplied with bond paper to simulate the screens over the windows and one side door.  After much searching, I found a fine-mesh nylon fabric to use for the screens, rather than the bond paper.


D&RGW Kitchen Car 04255.  Car is shown in front of the Durango Car Shop on the author's layout.

D&RG 4300 Boxcar, also at the Durango Car Shop.

D&RGW Water Service car 04432, also at the Durango Car Shop.

Friday, September 2, 2016

36th National Narrow Gauge Convention

The 36th National Narrow Gauge Convention was held in Augusta, Maine from September 7th through the 10th.  There was a mix of Maine two-foot prototypes and models, along with clinics and the Manufacturer's/Vendor room.  Most Convention activities took place at the Civic Center.  There were three rooms full of modular layouts.  I visited the WW&F, and the SR&RL prototype railroads, and several layouts.  I am sharing a few pictures of the prototype and modular railroads.


Prototype

Wiscasset, Waterville, and Farmington No. 9.  This locomotive has been fully restored.  Two-foot locomotives are cute!

Monson Railroad No. 3, running on the Sandy River & Rangeley Lakes.  This is a short run, but we had multiple photo run-bys. 


Models
 
Denver & RIo Grande Western No. 271, a C-16 class locomotive, beside the Dolores Feed Mill on the Canadian group's Dolores On3 modular layout.

Rio Grande Southern No. 41 running on the Canadian group's modular layout.  This is a new module, connected to their Dolores scene.

Another view of RGS 41 on the new module.

Saturday, August 20, 2016

The Wye at Dolores

I have completed installation of the wye at Dolores on my version of the Rio Grande Southern Railroad.  I made use of spline sub-roadbed to build smooth, eased curves leading into the wye, as well as the curved tracks of the wye itself.  I used 3/16" thick lauan plywood to construct the wye.  I cut leftover scrap lauan plywood into 1/2" wide by 8 foot long strips.  These strips were laminated together to form the sub-roadbed.  I am using 2" wide sub-roadbed to support Homasote roadbed made by Cascade Rail Supply.  This roadbed is supplied in two pieces, allowing curves to be made easily.  The two-piece construction makes a solid sub-roadbed very desirable.  I found that it required 11 strips of the lauan plywood, laminated together, to achieve the desired width.

As with Dolores, I chose to control the turnouts using Berrett Hill Trains Touch Toggles.  I used a DCC Specialties OG-AR Auto Reverser salvaged from my previous layout to automatically change the polarity of the rails as the train is turned.  The OG-AR has been replaced by the PSX-AR.


Overall view of the wye at Dolores.  The mainline curves from the upper right of the photo to the lower left .  It consists of 11 strips of lauan plywood laminated together using Titebond Ultimate III wood glue. 
The unfinished end of the laminated roadbed.  The varying lengths of the lauan plywood strips is shown.  This allows additional strips to be easily added.
THe end of the wye, showing the Cascade Rail Supply two-piece Homasote roadbed.  I marked the center strip of lauan plywood to ease installation of the roadbed.
 
It takes a lot of clamps to glue the strips together!

This is a small, inexpensive level available at local home centers.  I used this to ensure the track was level from side-to-side, and that a consistent uphill grade was achieved.

The electronic components required to control the turnouts and polarity of the wye.  Top row:  Berrett Hill Trains Touch Toggle components; consisting of 12 volt power supply, Tortoise connectors, 4 output Direct Base, and 4 Touch Toggles.  Bottom row:  DCC Specialties OG-AR automatic reverser.

Wednesday, June 22, 2016

Touch Toggles for Turnout Control

One of my goals for this model railroad is to try new technologies and techniques that can improve my modeling experience, and create a more enjoyable, authentic model railroad.  On the previous layout, I initially had control panels with Rotary-switch block controls, and DPDT switches to control turnouts.  When I converted the layout to DCC, I eliminated all block controls.  I also decided to convert to turnout control using DCC accessory decoders.  While this worked well, visitors to the layout found it difficult to remember turnout numbers, and how to throw the turnouts using the handheld throttles.  A new product has been introduced, Touch Toggles from Berrett Hill Trains.  I decided to give these a try after evaluating them at a couple of train shows.

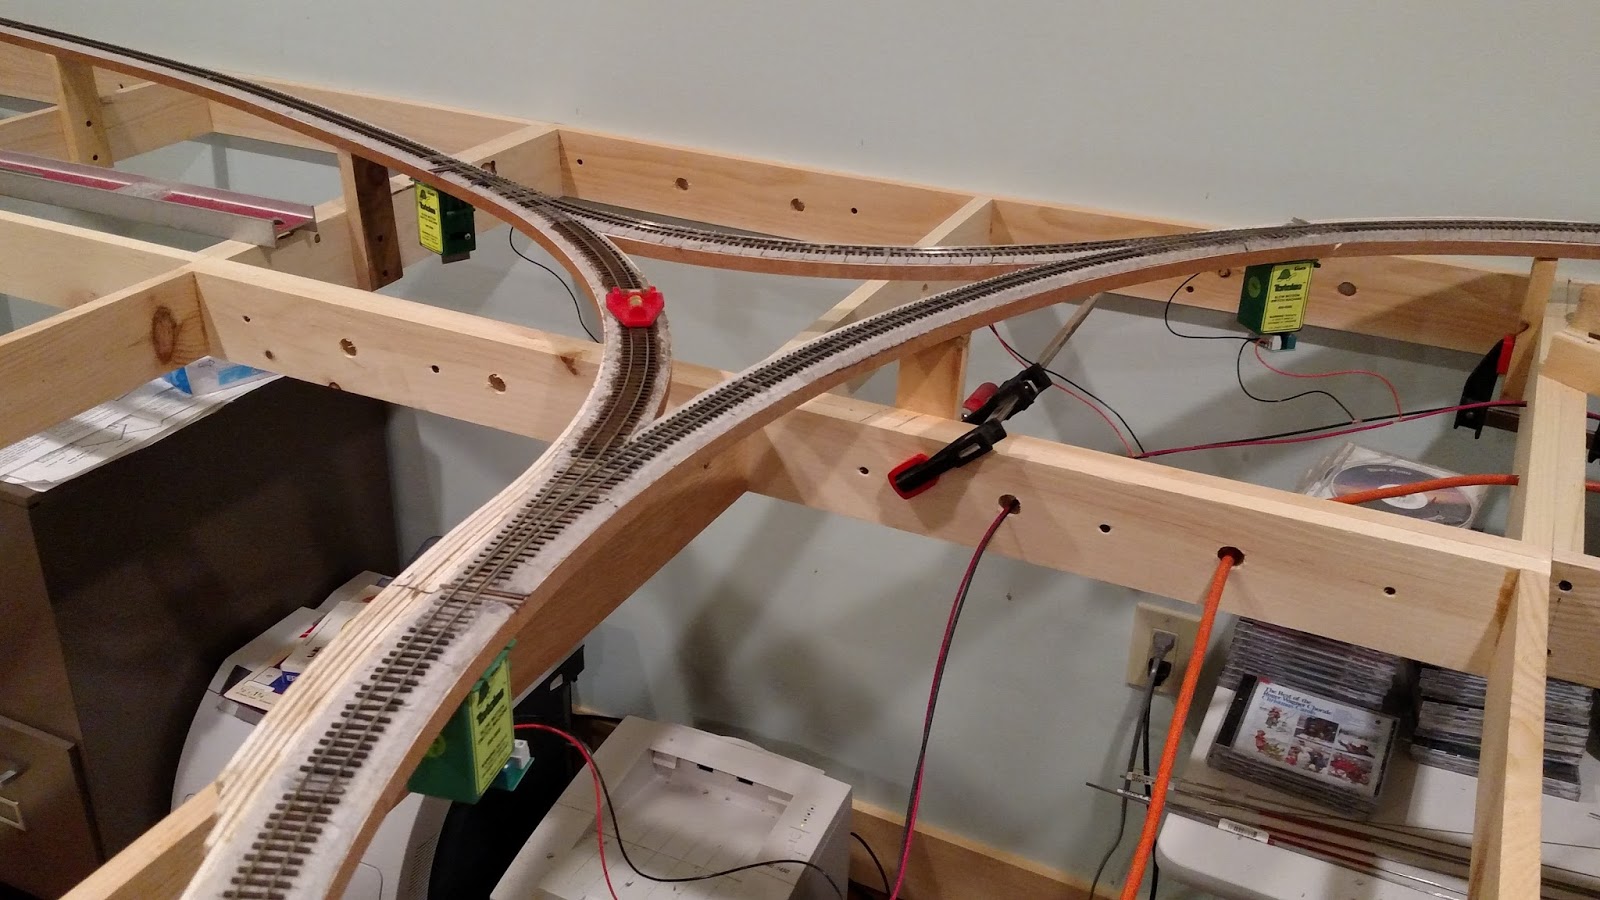
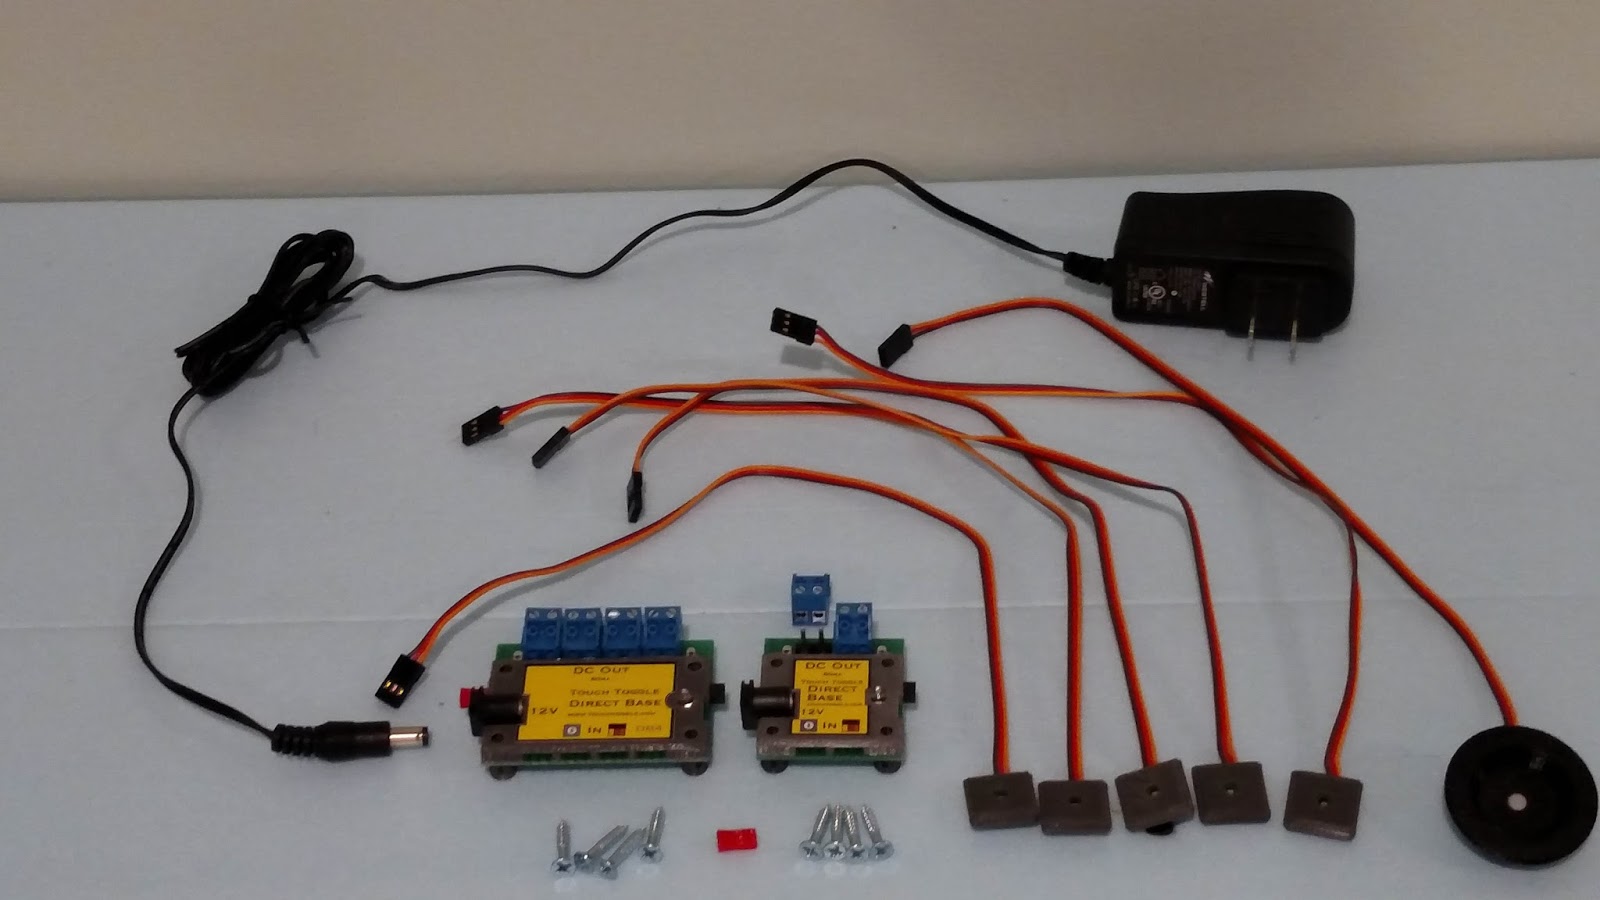
I am using Tortoise slow motion switch machines to control turnouts on the entire layout.  The town of Dolores has ten turnouts, and the Lost Canon stock pens has one, for a total of eleven turnouts to be controlled by Touch Toggles.  I purchased two four-output Direct System packages, each of which consist of a four-output Direct Base, four one-light Touch Toggles (which change color from red to green), and a 12-volt power supply.  I also purchased two additional two-output Direct Bases, two one-light Touch Toggles, and a new Mini-Cup Toggle, to control the lone turnout in Lost Canon.

I mounted the Direct Bases to the layout framing, and connected the power supply to the 110 volt layout power.  I plugged the Touch Toggles into the Direct Base, and the Tortoises are wired up to the screw connectors on the  Tortoise connectors.  This is much easier than soldering to the Tortoise.  Note:  the turnouts in Dolores are connected using SNAPS! wiring connectors from Accu-lites.  Similar connectors are available from Berrett Hill Trains; solder-style edge connectors are available from Greenway Products.  All turnouts in the Durango portion of the layout make use of the Greenway Products edge connectors.  I personally prefer a connector with screw terminals.

The Mini-Cup Toggle is intended for installations where a single control is needed, such as at the Lost Canon.


These are the Touch Toggle components used on each end of Dolores.  At the top is the 110 volt power supply.  From left to right are the:  4-position Direct Base; 2-position Direct Base; 5 single-light Touch Toggles; Mini-Cup Toggle.  Located below the Direct Base units are the #6x3/4" screws used to mount the Direct Base to the layout framework.  Note that only one power supply is required.  The Direct Bases can be connected together by removing the red cover from the pins, and plugging them together. 

Rio Grande Southern reaches Dolores, CO

I recently completed the trackwork into Dolores, Colorado.  The latest expansion to the layout consists of the crossing of the Animas River just outside Durango.  The track then passes by the Lost Canon stock pens, and climbs up a 1.75% grade into the town of Dolores.  The photos show that the diorama containing the Depot, Goose Barn, Toilet Building, and Gas Pump has been installed in a new location, compared to the previous track plan.  This demonstrates that track plans are fluid, and subject to change as construction progresses.  Future buildings include the Dolores Feed and Fruit Warehouse, Ford Dealer, Water Tank, and Pump House.  Eleven turnouts are in place, and controlled by Tortoise slow-motion switch machines.  The track is Code 55 Flex Track by Micro Engineering, and the No. 6 turnouts are scratchbuilt using Fast Tracks fixtures.  Turnout control, which is to be installed, will be accomplished using Berrett Hill Trains Touch Toggles.  Wiring has been completed, and trains have successfully negotiated the new trackwork into Dolores.  The following photos show the progress so far.


Rio Grande Southern bridge over the Animas River.

Overview of the Lost Canon trackage.  The Animas River bridge is to the right; the turnout will service the Lost Canon Stock Pens.  In the distance can be seen the town of Dolores.


Dolores CO.  Original diorama installed in permanent location on the layout.  Two inch blue foam was used as the base for the module, and additional sections. 


Overview of the town of Dolores.  The original diorama is located in the distance.  The ashpit/locomtive service tracks have been added.

A closer view of the original Dolores diorama, with the locomotive service tracks installed.

A view of the Dolores Depot installed in the layout.

View showing how the Dolores diorama was integrated into the layout.


The Dolores, CO CONOCO oil facility.  This is a Raggs...to Riches kit.  The main line will curve around to the left behind the oil facility.


Updated Trackplan

I have updated the track plan as follows.  Note that Ridgway has been moved to the end "blob", with a return loop added for continuous running.  This eliminates the need for a second deck.  Yes indeed, this track plan has been undergoing continuous modification.  However, construction is also proceeding.  The track is complete into Dolores, and is the subject of the next post.

Rio Grande Southern Railroad, v2.4.  Track from Dolores  to Ridgway is subject to change.

Tuesday, April 5, 2016

Benchwork Blitz

I have updated the trackplan shown in previous posts.  As such, I have recently constructed benchwork for the next section of the layout.  This section will house Hesperus, Vance Junction, Dolores, Lost Canon, Rico, and Placerville.  The benchwork for Ophir has not been started.  Also, the benchwork for Ridgway has not been started.  Some modification to the Ridgway scene may be required.

Note that a second deck is included for Ridgway.  The original location for Ridgway was too small; therefore a second deck was included above Hesperus and Vance Junction.  Dolores also required additional space, so it has been moved to a location along the center peninsula.  Rico will be at the end of the center peninsula, and Ophir will be on its own peninsula.


Overall view of the newly constructed benchwork.  The center peninsula, which will contain Rico and the Pro Patria Mill, is in the foreground.


The new benchwork showing the tentative location of the town of Dolores.

The central peninsula, showing its relationship to the existing town of Duango (in the background).


Latest Track Plan

I have been working on revisions to the track plan for my Rio Grande Southern layout.  Rather than post the plan in my previous post, I thought that it merited its own post.  Therefore, I am presenting the "final" plan.

Rio Grande Southern, v 2.2

Dolores Station Diorama

I have recently completed the station scene for Dolores on my Rio Grande Southern layout.  The scene is built upon 2" polyisocyanurate foam.  The track is Micro Engineering Code 55 Flex Track.  The Depot is a Laser Kit by American Model Builders; the Goose Barn is scratchbuilt, as is the Goose gasoline shed and outdoor toilet.

The Goose Barn was built following Mike Blazek's plans over a base of foam core.  I used Campbell corrugated metal for the sheathing, and styrene for the doors.  I finished the corrugated metal using my standard technique, discussed in previous posts.

The Gas shed was made by cutting a solid wood block to size on my table saw, and sheathing with corrugated metal.  The toilet was scratchbuilt from Evergreen Styrene clapboard siding, and strip styrene for trim.  The roof was shingled using leftover self-adhesive shingle strips.

Star brand paints were used for the final Rio Grande Southern colors of Jersey Cream and D&RGW Brown, available from PBL.

Ground cover consists of Cinders, dirt and ground foam.  The roads are decomposed granite leftover from drilling my well.  I made wooden road crossings from stripwood, stained with HunterLine Creosote Black.  I used static grass for the first time, and found that I liked the look.

Overall view of the Dolores Station Diorama.

The Dolores Station scene, with the toilet and Goose barn.

Close-up view of the scratchbuilt Toilet building.

The scratchbuilt Goose Barn.

The Dolores station and the Gasoline shed in place on the diorama.

The front (trackside) view of the Dolores station.