Friday, July 23, 2021

41st National Narrow Gauge Convention


 The 41st National Narrow Gauge Convention will be held in Hickory, NC from September 1 through September 4, 2021.  As my layout is on the Layout Tour for the Convention, this has provided a deadline to bring the layout to a reasonably complete appearance.  Although I have been hosting operating sessions on the layout as it has developed, I have recently achieved the notable milestone that all of the benchwork, trackwork, and wiring have been completed!

Statistics can be entertaining, so here are a few for the layout:

                        1.  Track - 937 feet of Micro-Engineering Code 55 Flex-Track

                        2.  Turnouts - 126, 8 of which are stub turnouts (on the Enterprise Branch).

                        3.  Tortoise Switch Machines - 118

                        4.  Servo Switch Machines - 8 (on the Enterprise Branch)

                        5.  One NCE Command Station

                        6.  Radio Base Unit - 1

                        7.  Two NCE boosters

                        8.  26 UTP fascia-mounted panels

                        9.  NCE Cab bus - 254 feet

                        10.  Power Districts - 8

                        11.  PSX Circuit breakers - 8

                        12.  Reversing Sections - 6

                        13.  PSX-AR Auto Reversers - 2

                        14.  OG-AR Auto Reversers - 4

Scenery has also been progressing on the layout, and my wife, Patty, has been making trees while I have been working on track and wiring.  To date, she has made about 650 trees, which are now beginning to be distributed among the more completed scenes.

Patty and I hope that you will join us for the Narrow Gauge Convention in just a few short weeks!

Vance Junction Outbuildings

Three of the four outbuildings for my Vance Junction scene have been completed, with the converted passenger car remaining to be finished.  These buildings were built from Banta Modelworks kits, and finished similarly to the Vance Junction Section House previously described.  The roofs on all of these buildings are tarpaper, and were painted with my dwindling supply of Polly Scale Grimy Black.  These buildings are located on the hillside adjacent to the Section House.
The handcar shed and boxcar shed at Vance Junction.  This is the trackside view of these buildings.

The shed and lean-to at Vance Junction.  The disks serve to hold the building in position until the model is permanently installed at Vance Junction.  This is the rear, non-trackside view of the building.

Vance Junction Section House

I recently completed the Vance Junction Section House.  This building was built from a Banta Modelworks kit, and went together very well.  The building is painted using Star brand paints, available from P-B-L.  The colors used were Jersey Cream for the body of the building, with D&RGW Trim Brown for the trim.  The basement board-and-batten siding was stained with Hunterline Barn Red stain, and the weathered wood deck and railings were stained using Hunterline Creosote Black.

Rear view of the Vance Junction Section House.  

Rear 3/4 view of the Vance Junction Section House.

Front (trackside) view of the Vance Junction Section House.


Scatter Grip, the adhesive I used to attach the laser-cut shingles to the roof.  This adhesive is brushed onto the roof surface, and stays sticky for weeks.  This allows plenty of time to attach the shingles without concern that the adhesive will dry out before the shingling is completed.

Thursday, July 22, 2021

Telluride Branch and Pandora

I have recently completed the Telluride Branch of the Rio Grande Southern Railroad, including the Pandora mining area.  The track plan for Telluride and Pandora was designed using Mike Blazek's Telluride and Pandora workbooks.

As with the rest of the layout, the track consists of Micro-Engineering Code 55 Flex Track.  There are 22 turnouts in Telluride and Pandora, all of which are handlaid using FastTracks fixtures.  Two of the turnouts are curved turnouts custom built to fit on the curves entering Pandora.

The turnouts are controlled, as on the rest of the layout, by Tortoise by Circuitron slow-motion switch machines.  Berrett Hill Easy Wire Tortoise Adapters ( click here) are used to simplify wiring.  Fascia-mounted Berrett Hill Touch Toggles are used for control.  

Wiring has been completed, and will be the subject of an additional post.  UTP panels have been installed in the fasica, although the layout is equipped with radio throttles.

A swing gate was installed across the bathroom doorway to connect Telluride to the rest of the layout, while still allowing access to the bathroom.  This will be the subject of a future post as well.

Overall view of Telluride.  Note the Raggs....to Riches Telluride depot.  The first train, headed by RGS  455 is leaving town.

The first train from Telluride is crossing the double deck swing gate .

The first train from Telluride is now leaving the swing gate, and is descending Keystone Hill, which on my layout is located above Placeville.


Saturday, January 23, 2021

Wye Turnout Control for the Telluride Branch

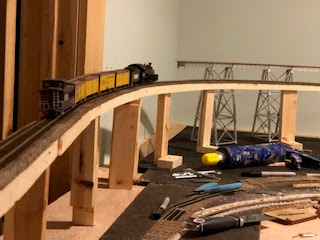
 Sometimes a small piece of technology comes along that makes operating your model railroad just a bit easier, or a bit more intuitive.  The Wye Track Adapter, from Berrett Hill Trains (http://www.berretthillshop.com/store/products/wye-adapter/) is just such a piece of technology.  I recently installed a Wye Track Adapter to control the turnouts of the wye (of course!) located between Telluride and Pandora on the Telluride Branch of my RGS layout.

The concept behind the Wye Track Adapter (WTA) is to use Touch Toggles to select a route through the wye, rather than selecting individual turnouts.  Some of my operators have experienced confusion setting the individual turnouts in a wye to the route that they wish to travel, especially if one of the turnouts is in a location where it is difficult to see which way the turnout is thrown.

I have installed the Touch Toggles into a small temporary control panel (as a 'proof-of-concept') mounted on the fascia.  The Touch Toggles are mounted such that the toggle itself is located between the turnouts.  The red or green indication on the toggle shows whether the turnouts are aligned for the route:  if the toggle is green, the two turnouts are aligned to allow train passage along the route.  The operator must only touch the toggle for the route desired.

So, how does one install such a beast?  Installation is actually simple, but a couple of notes may be helpful to you if you choose to install the WTA.


The Wye Track Adapter installed to the benchwork and connected to the two left inputs on the Direct Base.

The above photo shows the Wye Turnout Adapter plugged into the Direct Base.  The following steps should help clarify the installation:

1.  Note that the far left output (the blue connector at the top of the Direct Base) is wired to two Tortoise switch machines.  These will be thrown simultaneously.

2.  Temporarily plug a Touch Toggle into the far left input on the Direct Base.  This Toggle will throw the two turnouts for the main route simultaneously.

3.  Adjust the wiring to the two Tortoises so that both turnouts are aligned for the main route when the left Touch Toggle is green.

4.  Temporarily plug a Touch Toggle into the input next to the far left input.  Adjust the wiring such that the turnout is thrown in the proper direction.

5.  Disconnect the two Touch Toggles.

6.  Plug the WTA into the two inputs.

7.  Plug the Touch Toggle corresponding to the default route into Position 1 on the WTA.

8.  Plug the Touch Toggle selecting the second route into Position 2 on the WTA.

9.  Plug the third Touch Toggle onto Position 3 on the WTA.

10.  Note that the third input and output from the left will not be used.

Temporary track diagram of the wye located between Telluride and Pandora.  The green light indicates the selected route, with both turnouts aligned for this route

So, you may ask:  "Do you recommend the Wye Track Adapter?"   Yes, I do.  When properly installed, the selection of the route through the wye is intuitive, even to neophyte operators, and the turnouts for the through route are automatically aligned upon powering up the layout.  Try it - you'll like it!


Thursday, October 8, 2020

Updated "Final" Track Plan


There is, apparently, no such thing as "final"!  I have updated the track plan to show the additional industries that I recently added to Durango.  I added five sidings:  a siding for the Graden Flour Mill, the Federal Lumber Company, a Machinery Sales Company, the Conoco Oil Platform, and the Telluride Iron Works.  These tracks and industries are installed and functional.  This should allow for more challenging operations for the Durango operator.

"Final" Rio Grande Southern Railroad track plan, with additional industries located in Durango.


Wednesday, May 20, 2020

Ophir General Merchandise

I recently completed my model of the Ophir General Merchandise kit by Banta Modelworks (https://www.bantamodelworks.com/).  This kit was a challenge to bring to completion owing to a lack of information in the kit regarding the arrangement of the railings, stairways, and ladders on the decks and catwalks.  However, I made use of Mike Blazek's plans (http://blazeksplan.com/) for the structure, photos from the Rio Grande Southern Story, and parts from my scrap box to complete it.  I also found an adhesive which makes installation of the non-peel-and-stick shingles included in the kit much easier.


The Ophir General Merchandise store in HO scale.  This front view shows the gas pump from my scrap box, and the 3/4" thick pine block glued to the underside of the front porch to eliminate a warp.  The building is located adjacent to the track, with a road to the left climbing a steep grade.  The ladder, catwalk, and stairway shown in front of the building will be installed after the building is installed on the layout.
The left side of the Ophir General Merchandise.  The catwalk will be located between the second story doorway and the roadway.  The stairway leads down from the road to the front porch.


The right side of the Ophir General Merchandise, showing the tarpaper siding and basement wall.  The building is located on a sloped site, so the block in front will be hidden,

The rear of the Ophir General Merchandise.  The platform on the right will be accessed by the ladder (on the left).


Scatter Grip, the adhesive I used to attach the non-peel-and-stick shingles.  The material is painted onto the surface and allowed to dry.  It remains tacky for hours, so there is ample time to complete installation of the strips of shingles.  I found this to be much less frustrating and annoying than attempting to use spray glue to attach the shingles.  The product is available from Amazon.  Search for Deluxe Materials Scatter Grip.