The kit consists of laser-cut parts that fit together perfectly. The kit consists of laser-board sub walls, to which one glues the laser cut (perhaps laser-sculpted would be a better descriptor) corrugated siding. The roof stacks appear to be 3-D printed parts, and fit into the pre-cut holes in the roof panels perfectly. Kudos to the individual who did the laser cutting and 3-D printing.
Because the instructions are rather short on detail, I have put together the following assembly sequence which I used to assemble this kit. Follow along as I describe how I completed the Feed and Flour Mill.
1. Assemble the subwalls, ensuring that the parts are aligned accurately. I assembled the walls using Loctite thin ACC for the entire project.
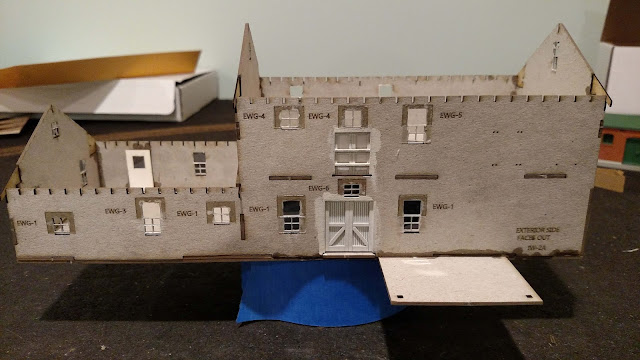
2. Paint the doors, assemble them, and glue to the backs of the subwalls, centering them in the openings. I painted the doors using Rust-O-Leum's Clean Metal Primer, which is a nice white color. I aligned the doors in their openings such that a space was left at the bottom to allow for the sills.
3. Glue the floor and subfloor together, again using the Loctite ACC. Ensure that the round holes in the floor are in alignment.
4. Glue the back subwall to the base, ensuring that it is square to the base.
5. Glue the second floor to the rear subwall, ensuring that it is square to the subwall.
6. Glue the two-story gable subwall to the floor, second floor, and rear subwall.
7. Glue the interior two-story gable subwall to the floor, second floor, and rear subwall.
8. Glue the single-story gable subwall to the floor, and rear subwall.
9. Glue the front subwall to the floor, second floor, and all three gable subwalls.
10. Paint the siding and the roof your favorite shade of silver to represent galvanized metal. I used Star-brand Smokebox Silver for the walls, and Floquil Platinum Mist for the roof panels.
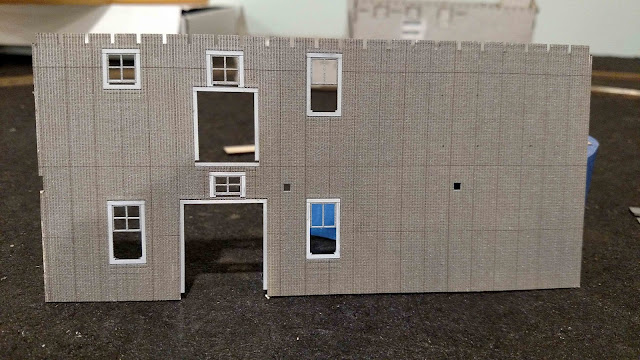
11. When thoroughly dry, mask the walls using blue painter's tape, exposing the windows and door trim. These details are laser-cut into the corrugated siding. I painted the windows and doors with Model Master White.
12. Add the glazing to the windows using Canopy Glue. Note that the glazing is to be installed on the outside and inside of the of the subwalls. Recessed areas are laser-cut into the front surface of the subwalls to receive the glazing.
13. Glue the front and rear siding to the subwalls, using Loctite ACC. Then glue the two ends to the assembly, also using Loctite ACC.
15. Install all roof rafters, and rafter tails into the slots in the completed walls.
16. Add the subroof panels to the single-story portion of the structure ONLY.
17. Glue the final piece of siding to the gable subwall above the subroof panel, using the Loctite ACC.
18. Add the subroof panels to the two-story portion of the structure, again using the Loctite ACC.
19. Add the notched rafters and barge boards to the roof, and paint them the trim color.
20. Pre-paint the window sills the trim color, and install all window and door sills.
21. Add the corrugated roof panels to the subroof. I used Aleene's Tacky Glue to allow positioning.
22. Add the corrugated ridge strips to the roofs.
23. I weathered the Mill with Pan Pastels. I used the following colors to achieve a rusty, weathered appearance: Neutral Gray Shade; Burnt Sienna Shade; and Red Iron Oxide.
24. I installed the structure in my town of Dolores, where it is ready to receive shipments!
 |
| The Dolores Feed Mill showing the painted and installed doors. |
 |
| The front two-story wall of the Dolores Feed Mill, showing the fine laser-cut corrugations. Note the Painted window and door trim. |
 |
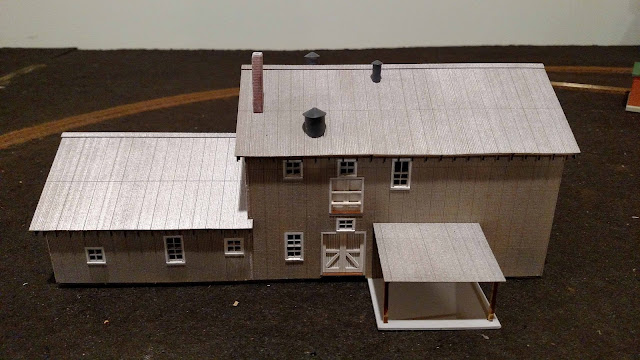
| The completed Dolores Feed Mill, prior to weathering. |
 |
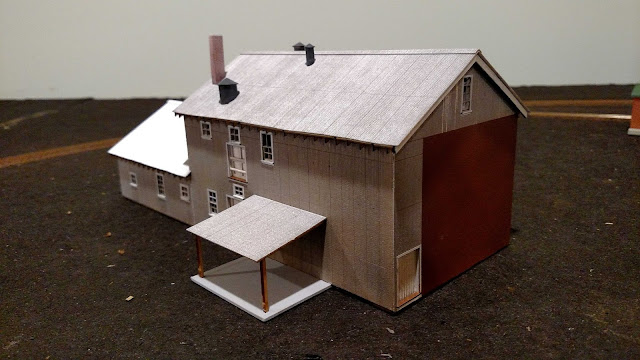
| Another view of the completed Dolores Feed Mill prior to weathering. |
 |
| Three-quarter view of the Mill, showing the laser-cut wood end wall. |
 |
| The rear of the Dolores Feed Mill. |
 |
| The Dolores Feed and Flour Mill in place on the layout. |