I have started the scenery on the layout, beginning with track
ballasting. I am starting with ballasting because the Durango Yard was
covered in cinders, and it made sense to do the ballasting and the
ground cover in the yard at the same time, since it used the same
materials. I started by using sanded tile grout, but completed the
project with two products from Scenic Express (
http://www.sceneryexpress.com):
Light Cinder Blend (fine), and #50 Dark Gray Ballast. I used the #50 Dark Gray Ballast for the majority of the yard, with a light uneven application of the Light Cinder Blend for variation. These products
are easy to install, and provided the gray ballast color that I wanted.
All of the ballast was secured using diluted Matte Medium, which I
diluted at a ratio of 1 part Matte Medium to 4 parts water. I used a
few drop of Jet Dry (available in the grocery store in the dishwasher
soap aisle) as a surfactant, reducing the surface tension of the diluted
Matte Medium and allowing it to penetrate the ballast and cinders.
Once
the ballast dried, I cleaned the track thoroughly using a steel bristle
brush. I am using Code 55 Flex Track, and the rails need to be very
clean with no particles of ballast adhering to the web of the rail. The
steel bristle brush made quick work of cleaning the sides of the rails,
and also removed any ballast grains that found their way to the tops of
the ties. Once the track was scrubbed clean to my satisfaction, I then
used a track cleaning block to polish the tops of the rails. All
turnouts were thoroughly cleaned to ensure that they moved freely. I
found that the Matte Medium did glue some turnouts in place, but it was
easy to free them up mechanically. I then test ran all freshly
ballasted track using my Galloping Goose #7, because it is very
sensitive to interruptions in track power. The countryside adjacent to the yard area has been sceniced using tile grout, ground granite (from drilling my well), and various ground foams. This scenery will be modified as the Durango area is filled with structures, but at least it looks better with scenery!
Astute viewers will note a change in the track arrangement to the left. I made a compromise with the track connecting to the Rio Grande Southern. This track serves as both a connection to the D&RGW eastbound and the westbound RGS. Yes, a willing suspension of disbelief is required. Because of this compromise, the track grade climbs, as per the D&RGW, rather than descends, as did the RGS. I chose to do this because it allowed a more visual separation of the two tracks in the yard. Just another compromise that we modellers must make!
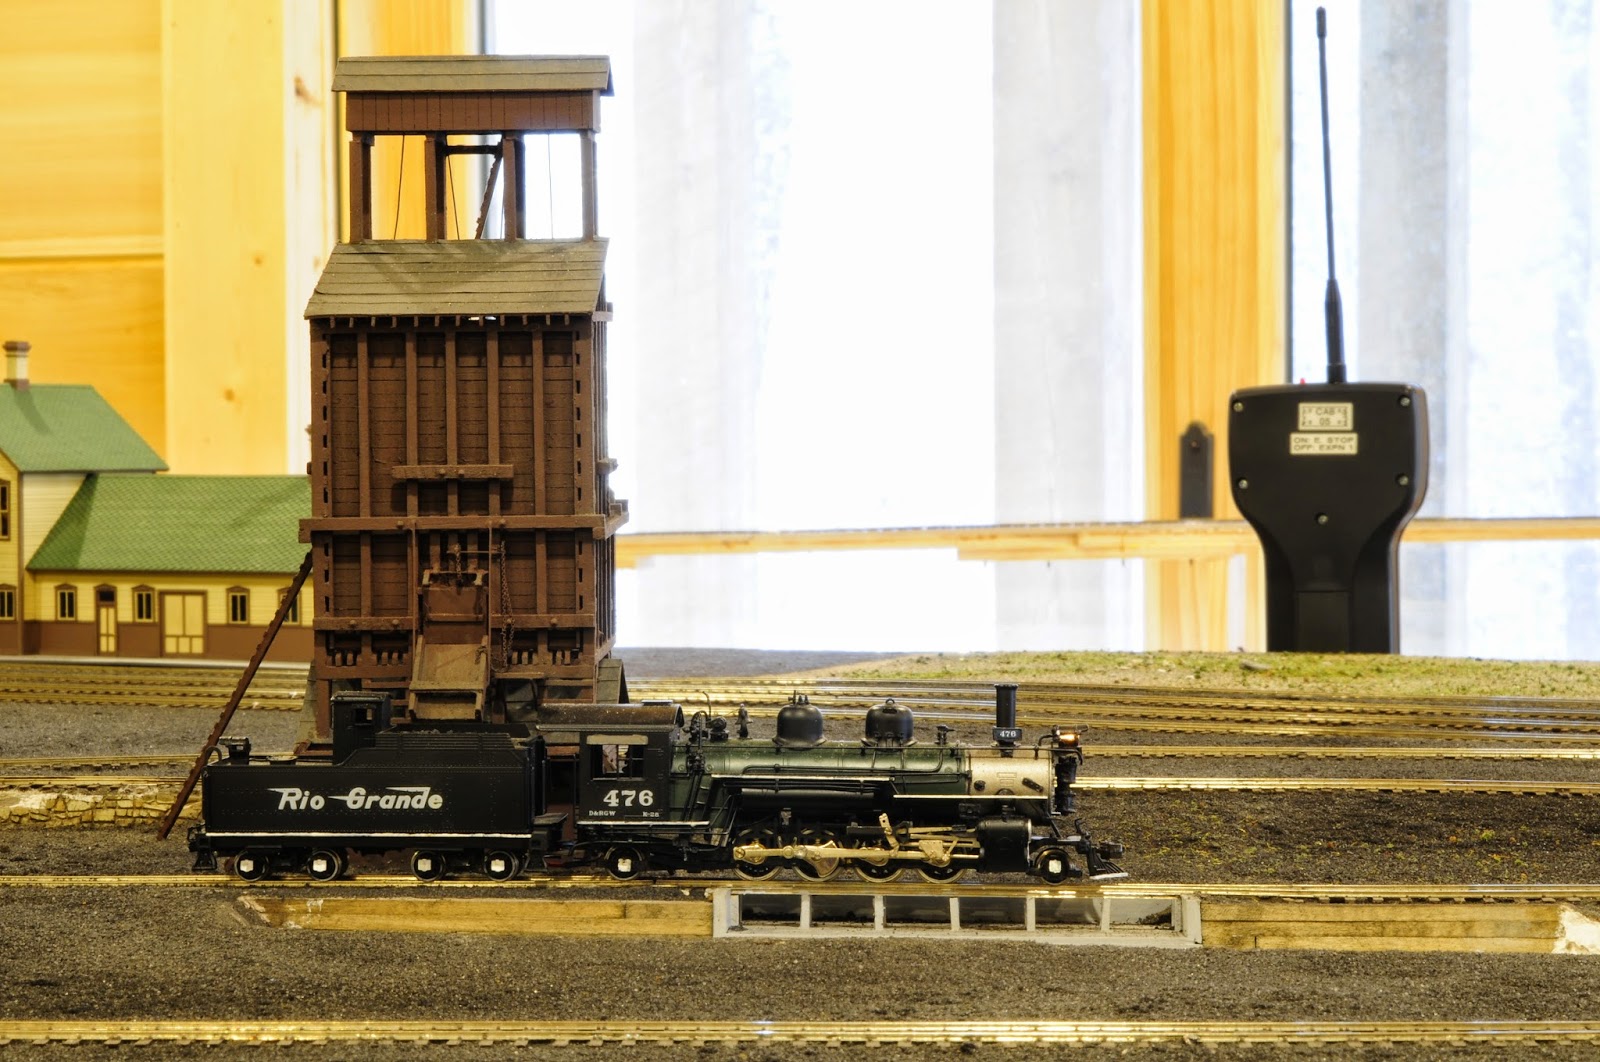
Also, I have installed the Durango Water tank (a Durango Press [
JL Innovative Design] kit), the Durango Sand House (Campbell Scale Models), and Handcar Shed (also Durango Press). These remain to be 'dirted in' using the cinders and vegetation.
 |
| An
overview of the Durango Yard. The water tank, ashpit, coaling tower,
turntable, and roundhouse are permanently installed, and ground cover
has been applied to the surrounding area. |
 |
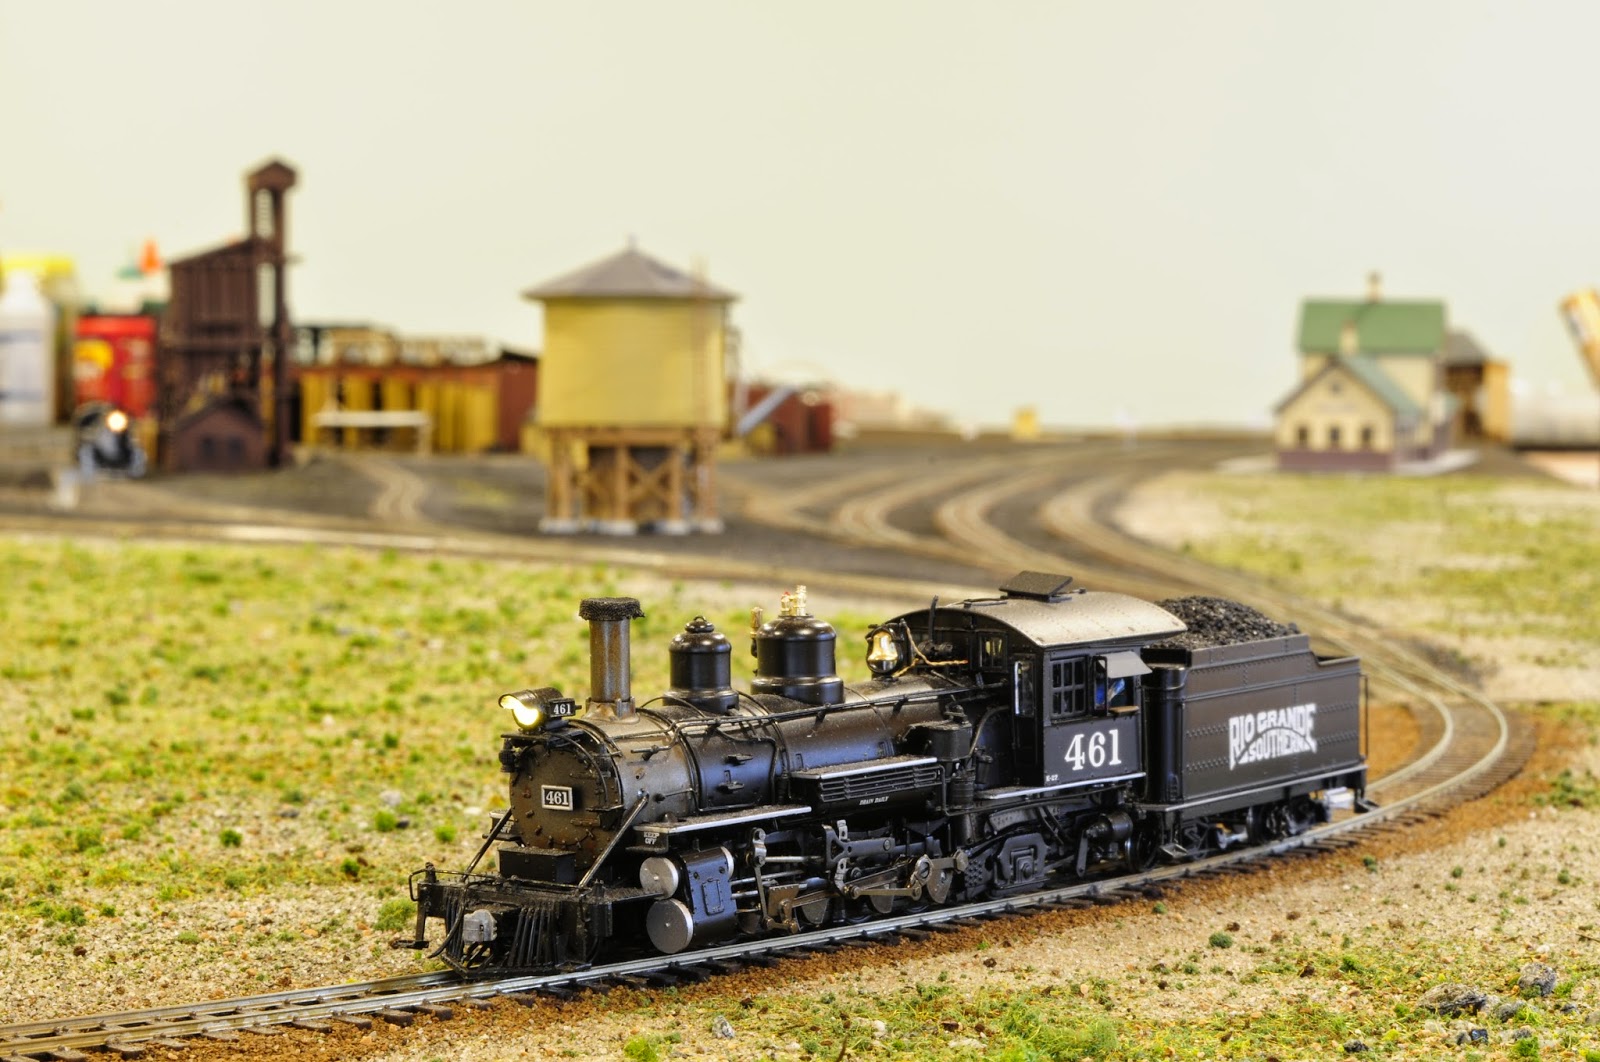
| Rio Grande Southern K-27 461 taking water at the Durango water tower. The yard has been ballasted, and the surrounding countryside has been sceniced. All track has been scrubbed clean with a steel bristle brush. |
 |
| D&RGW K-28 476 is being coaled at the Durango coaling tower. |
 |
| D&RGW K-28 476 has just finished receiving its load of coal in Durango. |
 |
| Rio Grande Southern 461 is preparing to leave Durango following being watered. |
 |
| RGS K-27 461 leaves Durango, traveling light. |